This classroom activity uses the Geogebra tool to derive and explore the trigonometric ratios. A right-angled triangle with given angles is created precisely and enlargements of this triangle are created. Ratios between sides are calculated and compared across all the triangles. These ratios are then compared with the sine, cosine and tangent trigonometric ratios for the given angles.

In this investigation you will explore similar right-angled triangles. Each student will explore a triangle with different angles.
- Record the angle assigned by your teacher, or randomly select an
angle between 30∘ and 75∘. - Open a new Geogebra window, ensuring that the grid and axes are
both showing.
Create a right-angled triangle, with one of the angles matching your
assigned angle, using the following steps:
- Create a line using the “Line” tool and a second perpendicular
line using the “Perpendicular Line” tool. The intersection of these two
lines will form the right-angle of our right-angled triangle.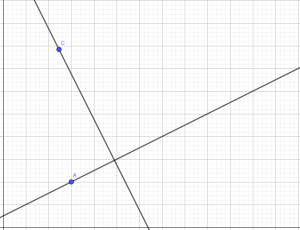
- Create an angle with the size specified in (1) using the “Angle
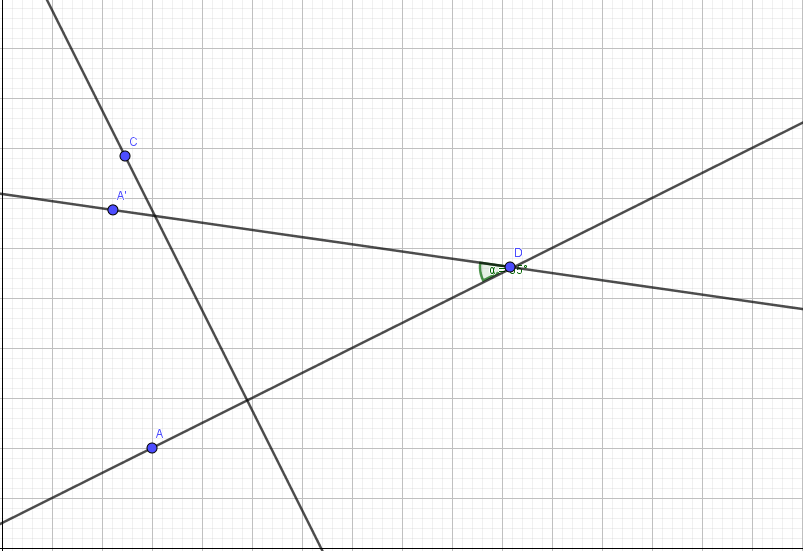
with Given Size” tool- Create a point D on the first line using the “Point on Object”
tool. The point should appear to the right of the intersection between
the two lines as shown in the diagram below. - Select the “Angle with Given Size” tool
- Click on point A
- Click on point D
- Select clockwise for the angle measure
- Enter the size of the angle (as given in (1))
- Use the “Line” tool to connect the two newly created points
(points A’ and D in the diagram below).

- Create a point D on the first line using the “Point on Object”
- Create two additional points (E and F below) at the intersections
of the lines using the “Intersect” tool. - Form a triangle using the “Polygon” tool that connects the three
intersection points.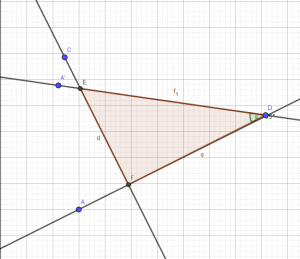
- Use the “Angle” tool to show the three angles within the
triangle. - Hide the unnecessary lines and points used in creating the
triangle by de-selecting the objects in the Algebra View.
- Measure the lengths of each side in the triangle.
- Save your file at this stage (if not done so already) and export
an PNG image file of your right-angled triangle. - Using the enlargement transformation method used in Part 1,
create enlargements of your right-angled triangle with scale factors of
2 and 4. - Measure all sides and angles in the two enlargements. Save your
file and export a PNG image file. - Record all angles, side lengths and side ratios in a table like
the following. You should record the lengths to 5 decimal places. Go to
Rounding under the Options menu and change the rounding settings.Angle Opp Adj Hyp Triangle 1 Triangle 2 Triangle 3


The angle is the one given in (1). Opposite, adjacent and hypotenuse
are all measured from the given angle as shown in the following
diagram.

- Comment on the ratios between the three sides for the three
triangles as shown in the table created in step (13). - For your given angle, use your calculator to complete the
following table.tan θ sin θ cos θ θ= - Using the tables from (13) and (15) complete the following rules
- Repeat step (13) using the other acute angle in your triangle,
recording your measurements and calculations in a new table. - Using the tables from (13), (15) and (17) define a rule(s) that
connects the sine and cosine functions.


