Students can design and implement programs using indefinite loops
Students can use the random number function in their programs
Students can design and use class level methods
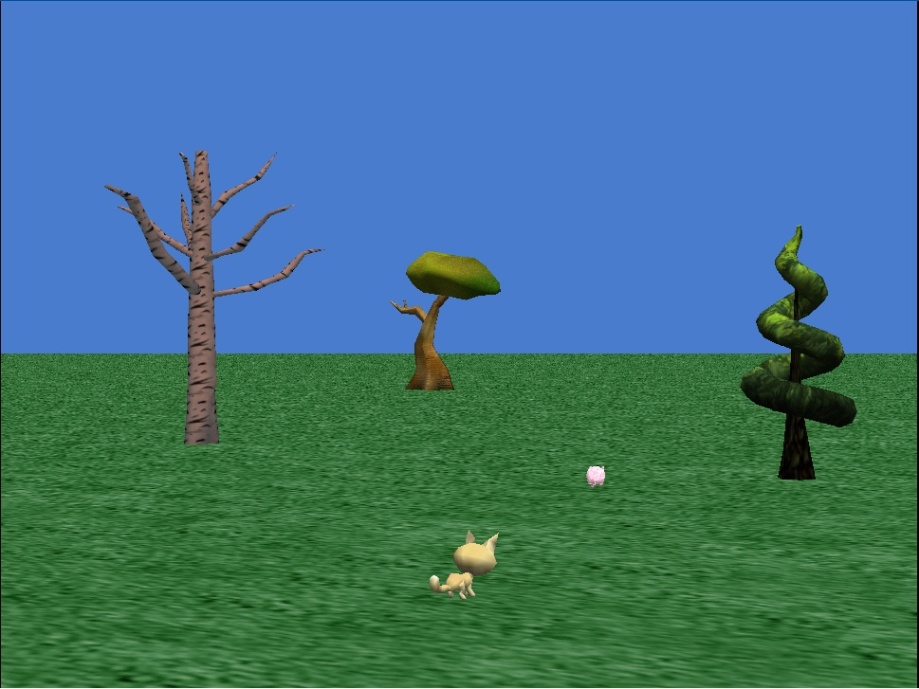
In this activity you will design and develop a cat and mouse game. The cat chases the mouse at the same time the mouse moves in a random direction trying to evade the cat. When the cat finally catches the mouse it will enjoy a tasty meal. To assist in the development of the program we provide a number of suggested development steps.
Step 1: creating the world
Create a new world that includes a Cat object (Animals) and a Mouse object (Animals). Ensure that the mouse is initially a reasonable distance away from the cat and that it is facing away from the cat. You may wish to add some additional scenery to make the chase a little more interesting.
Cat and mouse game
Step 2: creating Chase method
Create a new class method for the Cat class called chase. In this method the cat should turn to face the mouse, then move forward 1 metre. You may wish to add some animation to the cat’s movement, but you should do this after you have completed the other steps.
Step 3: creating run away method
Create a new class method for the Cat class called runAway. In this method the mouse should turn left or right a random amount (up to a maximum of ¼ of a revolution in either direction). You will need to use the random number function to determine the amount to turn. The mouse should then move forward 1 metre.
Step 4: Introducing a loop
In my first methodcreate a while loop. In the body of the while loop you must call the methods chase and runAway. You will need to design a test for the while loop, such that the loop continues until the cat is within a certain distance of the mouse (use an appropriate function to determine the distance between the cat and mouse).
STEP 5: catching the mouse
Create a new class method for the Cat class called eatMouse. The method should perform an appropriate action once the cat catches the mouse. Call the eatMouse method in my first method after the while loop.
Collision detection is a common feature of many animation tools, so a question that sometimes is asked when students first start using Alice is “where is built-in support for collision detection?”. The short answer is that there isn’t any. Remember that Alice is a programming environment in which students can develop animations, as opposed to a purpose built animation tool. However, because it is a programming environment, Alice gives programmers the ability to readily develop their own support for collision detection. This tutorial provides a description of how such collision detection support can be implemented.
The Alice World
The world for this tutorial consists of a Humvee van and a number of obstacles. Event handling methods and event handlers have already been implemented that allow the user to move the car around the world. For example the code for driving the Humvee forward is as follows. A “Do together” block is used to drive the move the car forward and at the same time rotate the wheel.
humvee.driveforward()
  No variables
  Do together
    humvee move forward 5 meters
    humvee.frontRightWheel turn forward 1 revolutions
    humvee.backLeftWheel turn forward 1 revolutions
    humvee.backRightWheel turn forward 1 revolutions
    humvee.frontLeftWheel turn forward 1 revolutions
Setting up collision detection
To set up collision detection and collision avoidance we begin by adding a method, called collision, to the world object that detects and reacts to collisions. We begin by setting this up for a single obstacle, in this case a building and then extend the code so that we can handle multiple obstacles. To detect a collision we use the “is within threshold of” function from the humvee object. This is used as the conditional of an if-then-else statement. If the condition is true, then the humvee reacts to the collision by moving backwards a short distance.
When using the “is within threshold of” function, we need to bear in mind that the function is measuring the distance between the centre of the Humvee and the centre of the obstacle. A collision with the side of the obstacle will therefore occur when the distance between the centres is half of the obstacle width + half of the Humvee depth. This distance will when the Humvee is approaching from a different direction, e.g. from the front of the building (in which case we might use the half of the obstacle depth). For this tutorial we just use the above calculation, but we could include a more sophisticated check by determining which direction the Humvee is approaching the obstacle from using the “is in front of” and similar functions.
After developing the collision method, we create a “while world is running” event handler. This event handler will call the collision method, such that whenever a collision is detected the Humvee will react and move backwards.
Dealing with multiple obstacles
So far we can only handle a single obstacle. We could of course develop similar methods to handle the other obstacles, but the DRY (don’t repeat yourself) principle suggests we should find a better way of doing this. Rather than repeating the code for the other obstacles, what we will do is generalise the existing code to handle many obstacles. To do this we use an list variable to represent the collection of all obstacles and then use the “for all do together” construct to implement collision detection and avoidance within a single method.
Video Tutorial
The following video tutorial provides a step-by-step description of the development of the collision detection capabilities.
Students can design a simple scenario using a combination of sequential and parallel actions, as well as simple loops
Students can implement their design using an appropriate combination of constructs.
Exercise 1
Create a new world using the space theme with a jump jet. In this exercise you will use “do in order” (sequential) and “do together” (parallel) constructs to move the jump jet.
In my first method, use the move method from the JumpJet object to move the jump jet up 5 metres, then forward 40 metres.
Modify your code so that the left and right jet engines are turned backwards ¼ of a revolution before the jet moves upwards. You should use a “do together” block to ensure that the two engines are turned at the same time.
Modify your code so that the jet engines are turned to their starting positions before the jet moves forwards.
Exercise 2
Create a new world with a dinosaur (or other large animal that has a moveable jaw) and a second animal, such as a chicken. In this exercise you will get the dinosaur to turn to face the chicken, then say “Hello” to the chicken while moving its mouth at the same time.
Write down a pseudo code design for the above scenario.
Use the “Do together” and “Do in order” constructs to implement the above scenario.
Now modify your code, using a simple loop, so that the dinosaur opens and closes its mouth 2 times each time the dinosaur says something. You will need to change the duration for the jaw movement commands.
Before attempting the steps shown below you may wish to complete the tutorials that come packaged with Alice. Click on the Tutorial tab in the Welcome to Alice screen. You may not understand all the concepts in the tutorials – do not worry we will explain these later in the course.
Step 1
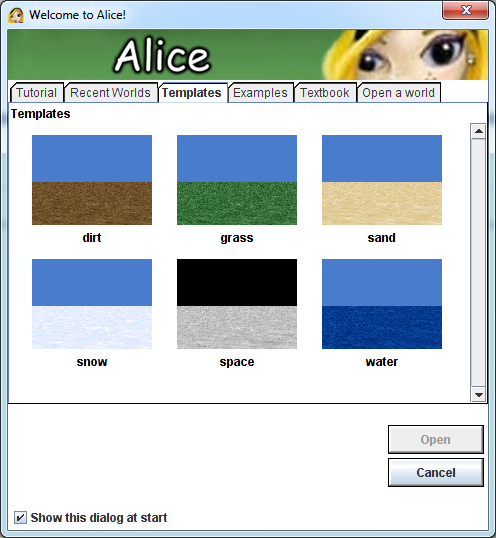
Run the Alice program and create a new world by clicking on the Templates tab on the Welcome to Alice screen. Then select the grass Template.
Selecting a background
Select the Add Objects button that appears next to the world view. The world view will be expanded and the Local Gallery will appear at the bottom of the screen.
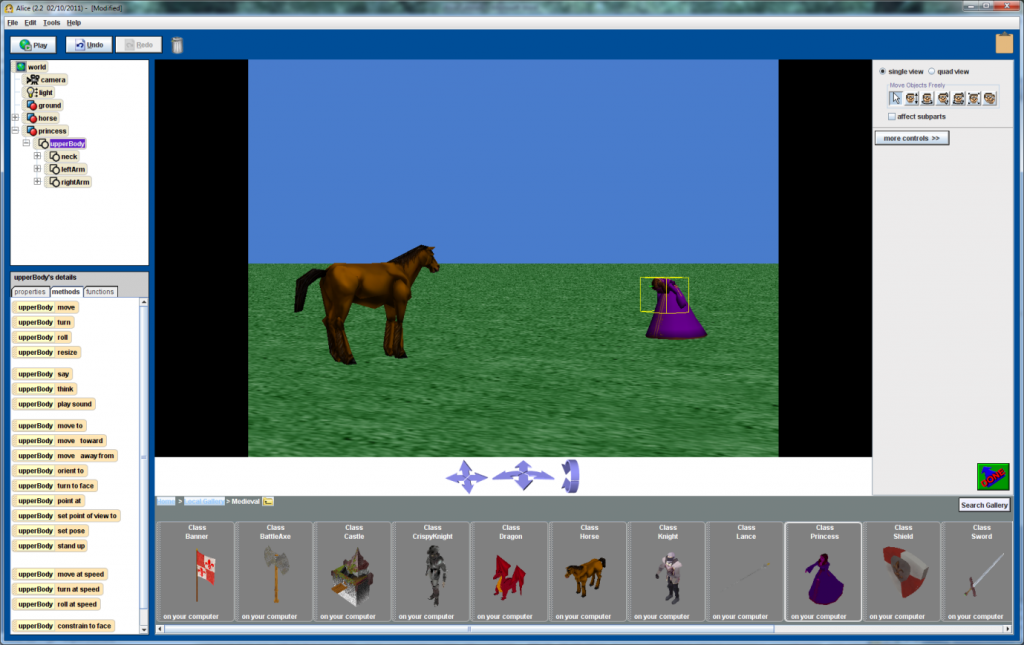
From the Local Gallery, select the Medieval folder, then select the Horse object and Princess object and drag them to the world view.
Inserting objects
At the moment the two objects are most likely not facing each other. In the Object Tree, right click on the Horse object, select methods from the menu and then select “horse turn to face”. Select Princess as the target. Do the same for the Princess object.
Finally make the Princess bow, by selecting the UpperBody part of the Princess and then selecting the turn method, turning the upper body forward ¼ of a revolution.
At this stage you should experiment with other methods on the princess and horse to move various body parts. At any stage you can press undo to cancel a particular move.
Step 2
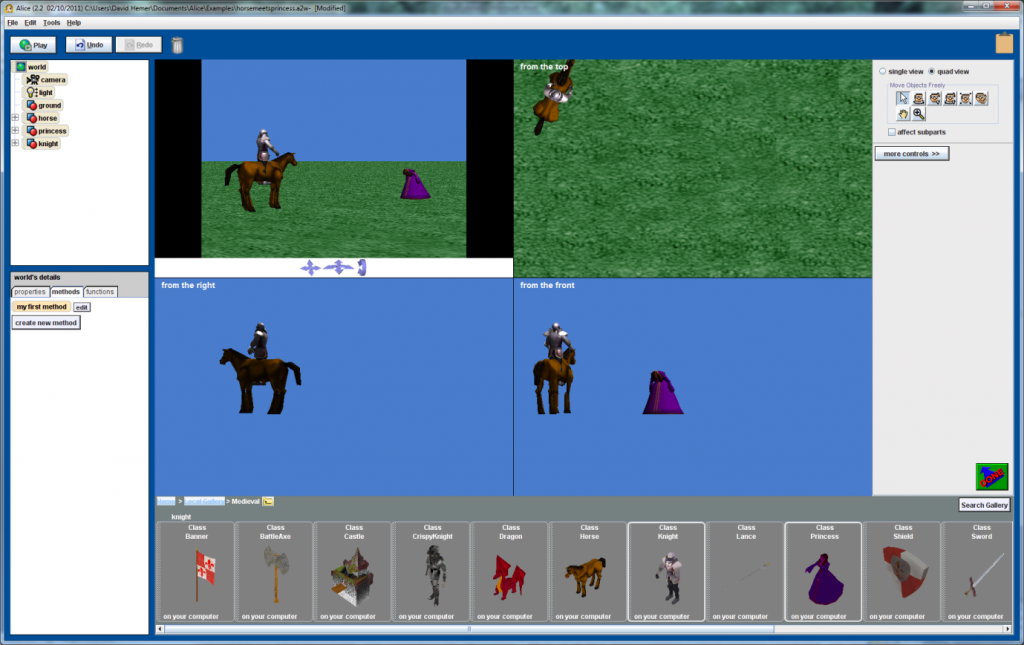
Add a Knight object from the Medieval folder. This will give you practise in positioning objects in the 3D world. Our aim is to sit the Knight on the Horse. The easiest way to position objects relative to other objects in the world is to use the quad view.You will need to use the different movement controls shown under the quad view button. This will take a bit of experimentation to get right, so don’t panic if you don’t get it right first try.
You will notice that the legs of the rider merge into the horse, which doesn’t look great. What you need to do is reposition the legs so that they look more natural. You should experiment with the turn methods on the different parts of the rider’s legs. This will again take a few tries, but remember you can always use undo if you make a mistake.